Like many women, I loooove hoops! I make quite a few, in different shapes and weights, and although some designs can get a bit complex, the basic “one piece of wire” hoop style is quite easy to make. It’s been a while since I posted a new tutorial (sorry!), so tonight it’s a “how-to” on making hoops! You’ll need the basic jewelry tools (chain nose pliers, cutters, and round nose pliers), as well as some metal smithing tools (steel block, chasing hammer, and a steel ring mandrel). But if you don’t have all of the metal smithing tools items, you can still practice all the basic steps without hammering…
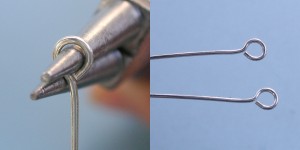
First, we cut 2 pieces of 20g dead soft round wire, each 3 1/4 inch long, and file/sand the ends flus. For reference, I am using sterling silver wire (plated wires may get damaged, but copper works great). Next, we will create a small, centered loop on one end of each wire. Start by grasping the wire between the jaws of the round nose pliers – note how the wire is flush, and doesn’t stick up!
TECHNIQUE TIP: The closer the wire is to the tip of the pliers, the smaller the loop.
Now, while holding the pliers firm, rotate the wire around one of the jaws to create a loop. If the loop doesn’t close, just reposition it, and pull the wire until you get a nice closed loop. Repeat with the second wire, making sure they look the same.
Now we need to center the loop over the wire. The easiest way to do this is to grasp the wire with the round nose pliers, so that the wire is hanging down between the jaws, and then gently pushing the wire back, which will reposition the loop and bring it to the center. If the loop opens up, just adjust it a bit…. this takes a little fiddling with, so just be gentle and keep at it until it looks right!
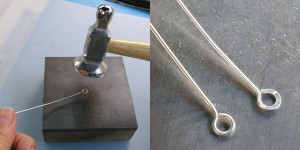
Wire is pretty malleable, and we need to harden the loops up a bit to keep them from opening. An easy way to do this is to lightly hammer them, using a chasing hammer on a steel block. The photo above on the right shows how hammering the loop lightly will flatten the wire, and change it’s appearance a little. The wire on the left has not yet been hammered, so you can see the difference. If needed, close up the loop – hammering will open it up a little.
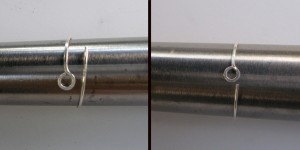
Now comes the part where they actually start to look like earrings! Start by wrapping the wire around a small end of the ring mandrel, and then sliding it down until the ends just meet. This way, the wire hugs the mandrel – if you start out wrapping it at the larger end, the wire springs open a bit, and you may not get the hoop to close. If you don’t have a ring mandrel, you can wrap the wire around anything that is the right size – a fat marker, a bottle top, or a pool cue make good alternatives.
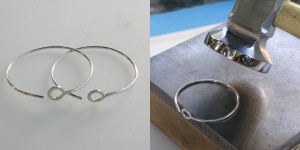
We’re almost done! Lightly hammering the hoops will harden them, so that when we open and close them, they spring back to shape. Make sure to position the loop over the side, and leave about 1/2 inch from each end unhammered. The hoops may get a little out of shape from the hammering – that’s ok – we will get them back in shape!
The hoops look pretty good, but we need to finish them by making the earring “catch” which fits into the loops to keep them from falling off. Using chain nose pliers (I am using bent chain nose, but any flat pliers will work), bend up the end sharply – about 1/8 inch.
If needed, close up the hoops, and slide them back over the mandrel – this will make them nice and round, and ready to wear. You can easily add additional charms or bead drops (I added some raw faceted citrine bead dangles), and change them to match your outfit.
TECHNIQUE TIP: Hammering the wire is an easy way to harden the wire, which helps to keep it shape. I also like the look of hammered wire. But an alternative is to create the hoops without any hammering, and then throw them in a jewelers tumbler for an hour or so – the tumbling will harden the wires, so that they have a springiness to them.
Have fun…!


