I Love Mandrels!

31 03 2011

Part of the “Tools that Delight” posts… As a wire worker, mandrels are some of my all time favorite tools. Since there are always lots of wraps and loops and coiling in my designs, it is important that there is consistency in the techniques used – sloppy wire work stands out, and makes a good design cheap.

Wire Wrap Stepped Mandrels

These are a new favorite tool of mine! I’ve been doing wire work for many years, and I’ve always used round nose pliers – I’m pretty good at it too! But there are some problems that folks have with pliers – most notably, it is difficult to repeat wire wraps with consistency, because the wire is easily moved up and down the pliers, resulting in loops that are not the same size.

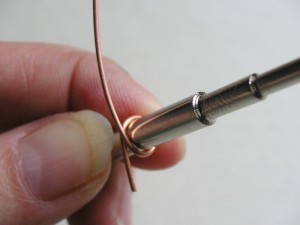
Wire Wraps.... Step Style!

Using stepped mandrels ensures that the wraps are always consistent, because the mandrels are cylindrical (rather than cone shaped), and the wire actually rests on a “step” so it can be repeated over and over with no change.

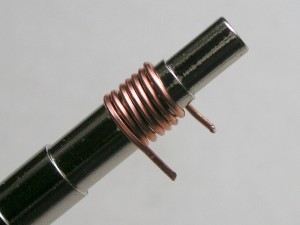
Coils and Jump Rings

Look how nice this coil looks, perfect to make a few jump rings. I confess – I have a complete jump ringer power system to make jump rings in quantity. But often, I just need a few, and it’s easier to wrap up a coil and saw or cut them.

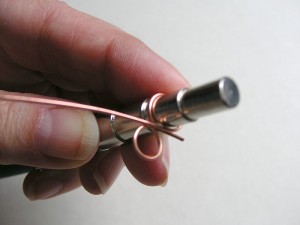
Easy Links - a "Figure 8"

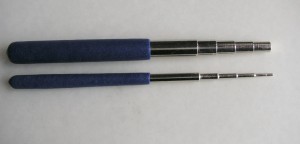
And it’s simple to make links – these mandrels have a range of sizes between 1.5mm and 10mm, so it’s super simple to create whatever size you need for your project. I make a whole bunch of these at one sitting, so that I always have them ready when needed.

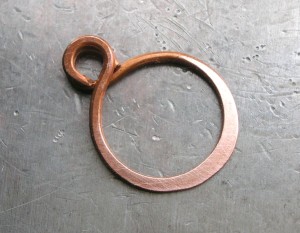
Hammered Link

This component (above) was made using a small wrap on one end, and a much larger wrap on the other. Then, the link was hammered flat to harden it so it doesn’t pull open, and also, because it looks cool hammered

I really really love these, and I now keep a set in my portable tool kit and bring them to class for my students to use.

Textured Padded Grip - Set of 2 Steel Stepped Mandrels

I also decided to sell them – if interested, they are available at my Etsy store in the Tools section. I include a tutorial on using the mandrels, as well as some practice wire, so it’s easy to get going… wire work is fun, and the ability to make your own jump rings and links and clasps is a great way to start adding handmade wire to your jewelry.

End of Winter Blahs…

22 03 2011

This is really not a blog post. It is an excuse, and an apology, for my lack of blog posts…

I can’t believe I am still coughing, and still lightheaded. It might have turned to bronchitis. I haven’t gone out in almost 2 weeks, and I even had to cancel a class, which I really hate to do. No matter what, I have to go out tomorrow (gotta see the tax guy – can’t put it off!), but I’m having my sister drive me, because I’m still feeling pretty fuzzy .

Before I got sick, I took photos for my next “Tools that Delight” posting, and I will try very hard to get to it this week.

But right now, I’m taking some Nyquil, and heading back to sleep… zzzzzzzz…..


The Bead Crochet Jig

9 03 2011

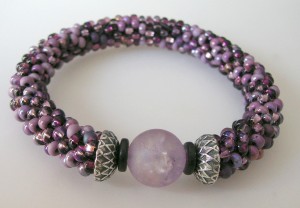
A Bead Crochet Rope Bracelet

When I learned to make bead crochet ropes a few years ago, I found it to be beyond frustrating! In my class, the instructor (Stephanie Riger – a wonderful jewelry designer and friend), made it look so easy… but I was totally unable to create the starting base rows. I was not the only one – Stephanie is a great teacher, but she had to create the first few rows for many of us. Once started, it took a while to learn the technique, but I didn’t find it too difficult to learn the basics, and now I can zip thru it! But the first few rows continued to be difficult – alot of rework, much frustration, and ripping out the first few rows. When I was asked to teach classes in bead crochet, I knew there had to be a better way to make the first few rows, so that it was easier and faster to get to the fun part!! So I did a lot of experimenting and prototyping, and finally came up with the Starter Jig.

So why is it so frustrating to start bead crochet ropes??

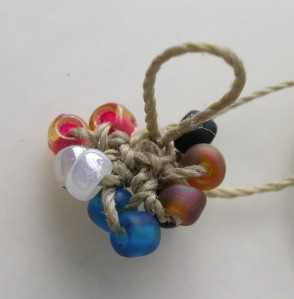
Close Up: Bead Crochet Starter Rows

Just look at it… to start, you crochet a ring of beads, and then add stitches thru the ring. This is 2 rows of bead crochet rope (5 beads around), done in size 6 beads. It can be difficult to tell where you would put the crochet hook, and where the next stitch should be, especially for someone learning. Although I tried to straighten it out for the photo, this is a real mess of thread and beads. So how does the jig help…?

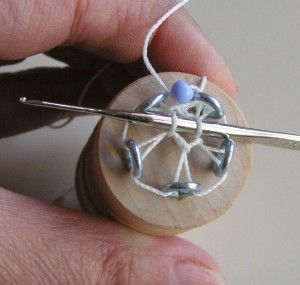
Using the Starter Jig creates a stable base

Creating bead crochet ropes is the same technique, whether you use the Starter Jig or manually create a starter ring. It’s the first few rows that are so frustrating, because there is no structure. Using the Starter Jig, you are able to easily stabilize the first few rows, so that you can position the crochet hook, and add stitches in the correct orientation. Once you have about 2 inches of beads, you remove the jig, and continue crocheting and finishing off your project.

Comparing the Starter Jig

In this photo, you can compare what 2 rows looks like when on the Starter Jig, or when done in a manual bead ring. For reference, I also show the same pattern of beads after about 2 inches – if this was a “real” project, the rope would be ready to be removed from the jig.

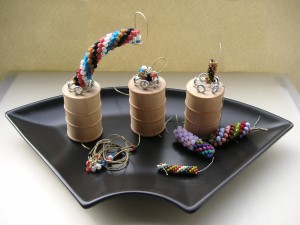
When I go to shows and events, I am able to demo the jig, showing customers the benefits: it’s easy to use, the starting rows are stable, and when you remove the jig, the starting rows are clean and neat (no more ripping out starter rows!). But I can’t always be there, so I created a mini display with a few pieces in process.

Demo Display

You can see the 3 comparison items shown above, and also a few sample pieces showing the ropes using varying size beads. Personally, I think people are a little crazy to use the tiny size 11’s (shown on the jig at the right), but alot of people asked if it could be done, so I had to try it out, and it works just fine…

One of my favorites!

I make most of my bracelets in size 6 beads, but I also like using size 8’s which are a bit smaller. This bracelet has been a favorite of mine, even though I no longer have it… the beads are vibrant, and the center focals and silver endcaps accent the pattern beautifully.

If you’re interested in buying a jig (it comes with an emailed 20+ page pdf tutorial, with over 50 photos), please CLICK HERE to visit my Etsy store (or you can click on my Etsy menu, in the right side), and check out the section on tools.