Where Have I Been?

30 05 2011

Some Changes Going On…

I usually keep my blog focused on jewelry making activities – creativity, my classes, tips and projects, and the business side. But today, I’m doing a quick write up about some changes going on.

It has been extremely difficult to realize that as much as I love creating, designing, and teaching classes, jewelry making is not a way for me to make a living. Even though I no longer live the style I used to as a corporate manager, I still need to pay the bills and feel comfortable financially, so I had to shift gears a bit, and look elsewhere.

What a Very Cool View!

A few weeks ago, I took a trip to Florida for a class I took (so nice to be a student for a change!), and this was the view from my seat… I love this picture! The class wasn’t about jewelry making – it was for a totally different business venture of mine that I have been involved in for the past 6 months, which is about to be launched.

In about 2 weeks, I will be opening up a store (brick and mortar), called “Big Frog Custom T-Shirts & More of Mountain View” and I was in Florida to attend my business training at FrogU (really!).

I had been looking at franchises for a while. I had a pretty extensive list of what I wanted, and after a few years of looking, the Big Frog franchise opportunity got before my eyes. It pretty much meets the key elements of what I was looking for in both a franchisor, and a business – a fun place, focused on customers, with potential to use both my creativity and my marking backround. So… I jumped into the pond, and I am now a Big Frog!

This is why I’ve been posting sporadically… I’ve always wanted StudioDax to remain mostly focused on jewelry – not my personal life, and not my Big Frog activities. Like so many others, I started StudioDax as a natural extension of my jewelry making hobby. StudioDax will continue – I will maintain my StudioDax Shop on Etsy, where I will continue selling some of my jewelry, some great jewelry tools, and of course my bead crochet Jig/Tutorial. I will continue developing and creating new designs because I love to design jewelry!!

AND – I will continue to post here on my blog, keeping the focus on things that the jewelry community will be interested in Although it is no longer the way I make a living, it is still a big part of who I am!

If you are interested in seeing what has been my focus for the past few months, you can check out my Facebook page for Big Frog of Mountain View. And I promise – my next post will be on something bling bling!


Death of a Printer

9 05 2011

(… and it wasn’t pretty!)

It started with a simple “5200 ERROR” – nothing I couldn’t handle. Just unplug the printer, wait a few minutes, plug it back in and power up while holding the reset button. But when new errors started showing up once or twice a week, I feared the worst…

Eventually, the message “WASTE INK ABSORBER FULL” showed up, and I knew it was time to get professional help, so I perused the “FIXYOUROWNPRINTER” website. If you own an older printer (or one that is worth less than a service call!), you need to check out this site. Non-techie types of people post questions about their printer problems, and wonderful technical folks respond, providing help and advice on how to fix their issue.

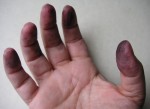
So… I learned how to clean out the waste ink absorbers. And I learned how to set the ABS-M and ABS-P LEVELS to zero (I have no idea what that is, but it helped…!). I cleaned the cartridge contacts, the underside foam buffer pad, and weird little plastic combs that collected huge amounts of ink. And I got very, very, dirty…

Not My Best Look...

But it seemed to work – my printer was printing, and all was well. And then the black ink  gave out, so I changed the cartridge. Nothing new about this – done it many many times. Except now the printer says “INK CARTRIDGE JAM” – so I go thru all the steps to clear errors, and the red alarm light goes off, and the error goes away.

Until the next day. Now the error is “”PUT IN CARTRIDGE,”  so I do what all the expert advice says to do – I remove the entire cartridge, turn the printer off/on, replace the cartridge, and reset. It doesn’t help. I unplug the printer. I get into maintenance mode in the menu, and reset all the user controls. PUT IN CARTRIDGE. PUT IN CARTRIDGE. PUT IN CARTRIDGE…. the friggin cartridge is in – I swear! I disconnect everything, and unplug it, and leave it for 2 days. I try again. I get the same message, so I shut it down, open it up, and re-clean all contacts. I try again… PUT IN CARTRIDGE. PUT IN CARTRIDGE. PUT IN CARTRIDGE….

I Killed the Printer!

I confess… I went a little crazy. I pulled up the platen and ripped the ribbon cables right out of it. I tore the plastic front plate off with my hands, and I pried off plastic bits with a screwdriver. Then I dropped it on the floor. Several times.

Sometimes, the frustration is just not worth the effort. And tomorrow, I get a new printer….


A Cool Cool, Clasp

23 04 2011

I doodle with wire… that’s right, I’m a doodler! When I’m sitting in front of the TV, I often have a few spools of copper wire in front me, along with my tools, and just twist and wrap and fold and coil! Seeing different designs and ideas come together is very satisfying!
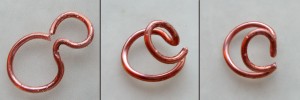
Sometimes I start out with a sketch that I made, and see how it turns out. And sometimes I start with something specific in mind, to see if I can make it work. I wanted to see if I could come up with a simple circular clasp, maybe to use for some multi-stranded necklace designs, and this is how it progressed!

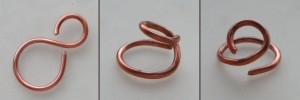
Doodle Try #1

I had a few parameters for the clasp: I wanted clean lines, I wanted the hook side and the eye side to lay in the same direction so it would be comfortable on the neck, and it needed to be easy to use. The first “doodle” started with a figure “8” in wire, which I sorta folded over, so that the smaller loop rested on top of the bigger loop. This has a construction issue, because I would have to solder both ends to a common wire at the point where the clasp folds, leaving 2 potential weak spots.

Doodle Try #2

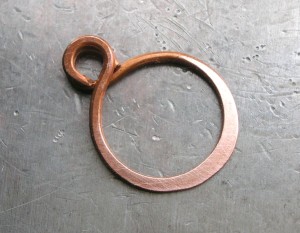
The next doodle was similar in look, but it starts with an “O” shape that is pinched to create the two loops. This has a real advantage over the first style, in that the ends of the wire meet together, so it only has one connecting point. And since the original shape is round, it is easy to make sure the solder point doesn’t get stressed.

Final Clasp in Silver

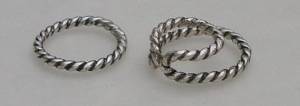
I decided to create the clasp using some twisted wire I had, and I love the end result. I started by soldering a large ring, and then shaped it like an “8” using some mandrels. Once the loops were nice and round, I carefully folded it at the place it pinched to create the hook. Next, I created the other side sizing it to the clasp.

Silver Clasp Closed

Here is the clasp closed – you can see how the two sides are balanced, so it looks nice, both sides lay in the same direction, so it is flat against the neck, and there are no wire ends, so nothing catches onto your clothes or sticks into you.

I have tried variations of this without soldering, some work ok, but the advantage of the soldering is that it makes the clasp robust. Knowing a variety of techniques is key to being able to create your designs as you envision them…!


Perfect Wirework!

11 04 2011

Although most of my work is very “one-of-a-kind” and organic in nature, being a professional means that I don’t mess around with my wirework! It takes time and practice to achieve a clean line, and it can be difficult to get repeatable results.

One of the things I’ve been doing for years is to always prototype and document my new work. Whenever I develop a project for a  class, I write out notes and sketch my ideas – many don’t work out, but I often find an element of the idea that appeals to me, and I wind up using it for something totally different.

I also teach my students one of the “tricks” I use for wire components, which helps to really ensure repeatability – I create wire templates.

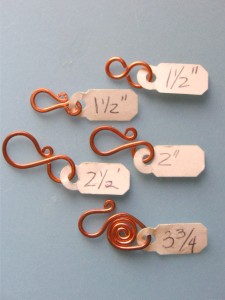
16g Wire Clasp Components

Once I know HOW to make something, I like to play around with different wire gauges and lengths – there’s no such thing as “one size fits all” so if something works, I always see how far I can take it! In the photo above, it’s easy to see how the different length of wire makes clasps of different sizes (you can learn to make a wire clasp in this TUTORIAL). This way, I can just pick the clasp that works for my project, and easily make it the same size. On one side of the tag I mark the wire gauge, on the other, the length.

Wire Wrapped Beads

Not just for clasps – I make this type of template for other wire components (such as wire spirals HERE), as well as these wire wrapped beads, so I can make sure to cut the right size wire when making bead links (I just love making the link with the zigzag on the wrap!).

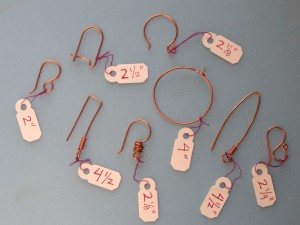
And if you like to make earwires that are as creative as your earrings, than wire templates are a great help – it’s important to get the proportions accurate.

A Variety of Hooks and Hoops

I love creating different earwires – these are the ones I use most because they are the most flexible. You can make a whole earring wardrobe using simple gemstone or pearl drops, and putting them on different wires! I have already posted two tutorials in this blog for SIMPLE EARWIRES and SIMPLE HOOPS – I always seem to get alot of folks who check out the wire tutorials, so I’m thinking it’s time to post a few more… any favorites?? Just post a comment, and I’ll see what I can do!


I Love Mandrels!

31 03 2011

Part of the “Tools that Delight” posts… As a wire worker, mandrels are some of my all time favorite tools. Since there are always lots of wraps and loops and coiling in my designs, it is important that there is consistency in the techniques used – sloppy wire work stands out, and makes a good design cheap.

Wire Wrap Stepped Mandrels

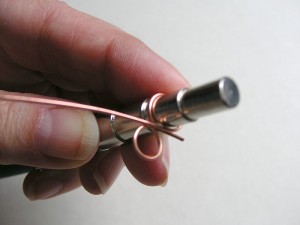
These are a new favorite tool of mine! I’ve been doing wire work for many years, and I’ve always used round nose pliers – I’m pretty good at it too! But there are some problems that folks have with pliers – most notably, it is difficult to repeat wire wraps with consistency, because the wire is easily moved up and down the pliers, resulting in loops that are not the same size.

Wire Wraps.... Step Style!

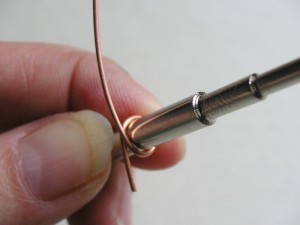
Using stepped mandrels ensures that the wraps are always consistent, because the mandrels are cylindrical (rather than cone shaped), and the wire actually rests on a “step” so it can be repeated over and over with no change.

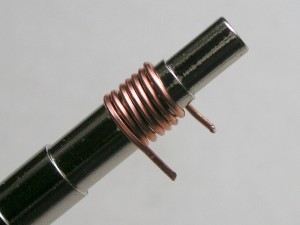
Coils and Jump Rings

Look how nice this coil looks, perfect to make a few jump rings. I confess – I have a complete jump ringer power system to make jump rings in quantity. But often, I just need a few, and it’s easier to wrap up a coil and saw or cut them.

Easy Links - a "Figure 8"

And it’s simple to make links – these mandrels have a range of sizes between 1.5mm and 10mm, so it’s super simple to create whatever size you need for your project. I make a whole bunch of these at one sitting, so that I always have them ready when needed.

Hammered Link

This component (above) was made using a small wrap on one end, and a much larger wrap on the other. Then, the link was hammered flat to harden it so it doesn’t pull open, and also, because it looks cool hammered

I really really love these, and I now keep a set in my portable tool kit and bring them to class for my students to use.

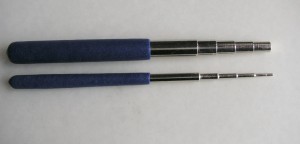
Textured Padded Grip - Set of 2 Steel Stepped Mandrels

I also decided to sell them – if interested, they are available at my Etsy store in the Tools section. I include a tutorial on using the mandrels, as well as some practice wire, so it’s easy to get going… wire work is fun, and the ability to make your own jump rings and links and clasps is a great way to start adding handmade wire to your jewelry.


End of Winter Blahs…

22 03 2011

This is really not a blog post. It is an excuse, and an apology, for my lack of blog posts…

I can’t believe I am still coughing, and still lightheaded. It might have turned to bronchitis. I haven’t gone out in almost 2 weeks, and I even had to cancel a class, which I really hate to do. No matter what, I have to go out tomorrow (gotta see the tax guy – can’t put it off!), but I’m having my sister drive me, because I’m still feeling pretty fuzzy .

Before I got sick, I took photos for my next “Tools that Delight” posting, and I will try very hard to get to it this week.

But right now, I’m taking some Nyquil, and heading back to sleep… zzzzzzzz…..


The Bead Crochet Jig

9 03 2011

A Bead Crochet Rope Bracelet

When I learned to make bead crochet ropes a few years ago, I found it to be beyond frustrating! In my class, the instructor (Stephanie Riger – a wonderful jewelry designer and friend), made it look so easy… but I was totally unable to create the starting base rows. I was not the only one – Stephanie is a great teacher, but she had to create the first few rows for many of us. Once started, it took a while to learn the technique, but I didn’t find it too difficult to learn the basics, and now I can zip thru it! But the first few rows continued to be difficult – alot of rework, much frustration, and ripping out the first few rows. When I was asked to teach classes in bead crochet, I knew there had to be a better way to make the first few rows, so that it was easier and faster to get to the fun part!! So I did a lot of experimenting and prototyping, and finally came up with the Starter Jig.
So why is it so frustrating to start bead crochet ropes??

Close Up: Bead Crochet Starter Rows

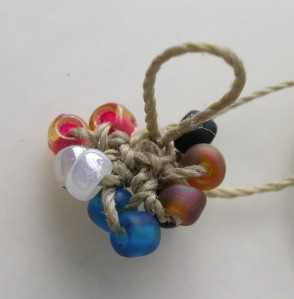
Just look at it… to start, you crochet a ring of beads, and then add stitches thru the ring. This is 2 rows of bead crochet rope (5 beads around), done in size 6 beads. It can be difficult to tell where you would put the crochet hook, and where the next stitch should be, especially for someone learning. Although I tried to straighten it out for the photo, this is a real mess of thread and beads. So how does the jig help…?

Using the Starter Jig creates a stable base

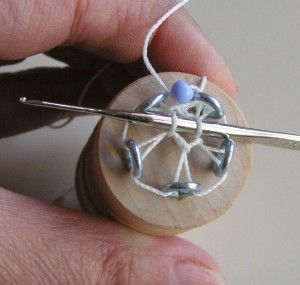
Creating bead crochet ropes is the same technique, whether you use the Starter Jig or manually create a starter ring. It’s the first few rows that are so frustrating, because there is no structure. Using the Starter Jig, you are able to easily stabilize the first few rows, so that you can position the crochet hook, and add stitches in the correct orientation. Once you have about 2 inches of beads, you remove the jig, and continue crocheting and finishing off your project.

Comparing the Starter Jig

In this photo, you can compare what 2 rows looks like when on the Starter Jig, or when done in a manual bead ring. For reference, I also show the same pattern of beads after about 2 inches – if this was a “real” project, the rope would be ready to be removed from the jig.

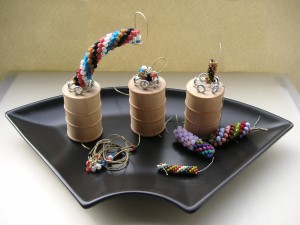
When I go to shows and events, I am able to demo the jig, showing customers the benefits: it’s easy to use, the starting rows are stable, and when you remove the jig, the starting rows are clean and neat (no more ripping out starter rows!). But I can’t always be there, so I created a mini display with a few pieces in process.

Demo Display

You can see the 3 comparison items shown above, and also a few sample pieces showing the ropes using varying size beads. Personally, I think people are a little crazy to use the tiny size 11’s (shown on the jig at the right), but alot of people asked if it could be done, so I had to try it out, and it works just fine…

One of my favorites!

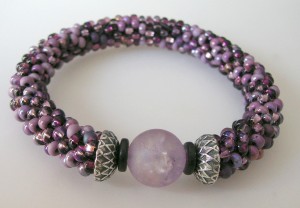
I make most of my bracelets in size 6 beads, but I also like using size 8’s which are a bit smaller. This bracelet has been a favorite of mine, even though I no longer have it… the beads are vibrant, and the center focals and silver endcaps accent the pattern beautifully.

If you’re interested in buying a jig (it comes with an emailed 20+ page pdf tutorial, with over 50 photos), please CLICK HERE to visit my Etsy store (or you can click on my Etsy menu, in the right side), and check out the section on tools.


A Little Bling Bling

28 02 2011

A Little Bling Goes A Long Way….

It can be tricky to combine the sparkle of crystal with stark metalwork, but if you keep the design sleek and simple, then the materials work together really well. Back in September, I taught a class at Hooked on Wire, and attended a presentation from the Swarovski folks… I got loads of little crystal bits (see my previous post on this HERE),  and finally got around to creating a new design, which I really love!

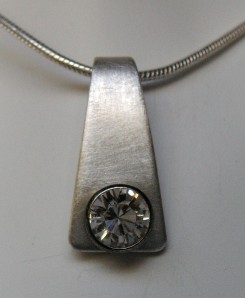
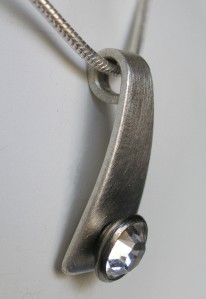
I designed the piece using heavy gauge sterling silver (18g), which I gave a soft matte finish, and added a preset 7mm crystal rivet cup (NOTE: click on photos to enlarge):

Simplicity - Sparkle and Silver

Isn’t this a great look!?! I cut a simple triangle from some scrap silver sheet I had, rounded the edges and the corners, and used a combination of files, sanding blocks, and polishing papers to get the soft finish. I then drilled a hole so I could add the crystal (the crystal comes pre-set in the rivet setting).

A Modern Style, A Classic Look

From the side view, you can see a bit more detail – when I drilled the hole for the crystal setting, I beveled the edge of the hole to accommodate the angle and allow the cup to seat into the silver. I curved the silver lightly to balance the formed bale – the minimalist shape provides a graceful way to hang the pendant on a chain.

Best Not Seen... The Back!

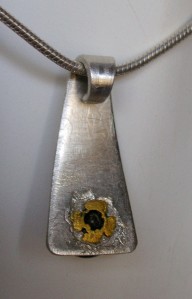
The back looks a bit messier than it really is… the tube (rivet) was quite long, so I had to cut it’s length, and then cut down the tube to create tabs to fasten it to the silver. Since the rivet is brass, I was concerned that if I manipulated it too much, it would become brittle and crack. So I simply hammered the tabs down, and added a blob of E6000 to cover the tab edges so they don’t catch or scratch (E6000 is a thick adhesive).

Just Hanging Around

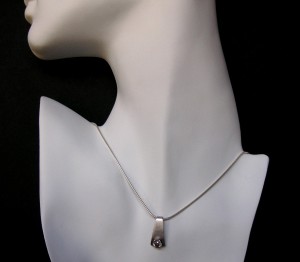
I love how this pendant looks – right at the collarbone, showing on the skin. The crystal makes it pop, and with the matte finish on the silver, this is a piece that looks great jeans and a sweater, or all dressed up – since it’s Swarovski, the quality crystal  sparkles however you wear it!

I gave this one to a friend as a thank you gift, but I’ll be making a few more, maybe even with different shapes, but the same styling. I just love when the end result looks better than what I imagined!


Stitches: A Fiber Show

22 02 2011

I think of my jewelry as falling into the “metal arts” category – silver, copper, hammers, and torches – yep, that’s metal arts! I sometimes use beads and gemstones, but most of the time, they are the accents, not the focus.

I have 2 major exceptions to this, which I call my “soft” side – my bead crochet, which uses seed beads, and my kumihimo, which uses colored cords and fibers. And this past weekend, I indulged a bit in my soft side, and I attended Stitches.

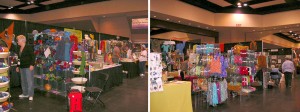
Stitches is a convention of all things fiber: spinning, knitting, weaving, crocheting – it is a huge meeting of the soft and fluffy yarns, the new wool blends, the natural fibers, and the hand-dyed… it is the opposite of a bead show, where all the materials are stone and glass and gems.

Aisles at Stitches (click photo for close-up)

Look at all the vivid colors – what you can’t see is the textures and the different yarns – the silks, the wools, the cashmeres, the soys, the cottons – absolutely wonderful to take in. I really love the weaving – it looks like something I could get into in the future, although I don’t know what I’d do with the fabric once woven! There were also gorgeous sweaters, jackets, socks, and blankets – available in patterns and kits… if only I was fiber-friendly!

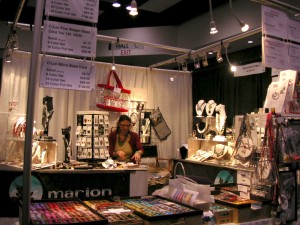
Marion Jewels in Fiber Booth (click photo for close-up)

I spent one day roaming the floor, and checking out the goods… I bought some great ribbon style yarn, which I’m using for some kumihimo projects (I’ll do that in a later post), and I spent a day doing demo’s at a friends booth – Marion Jewels in Fiber. Marion has a great online store, where she carries an extraodinary selection of silk threads, as well as the full line of C-Lon cording. Also, she sells kumihimo kits, micro-macrame materials, tools, and my StudioDax Bead Crochet Jig.

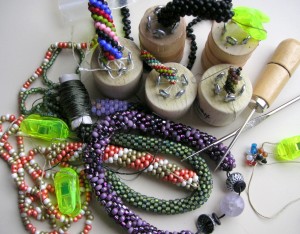
My StudioDax Bead Crochet Jig - Demo Kit

After doing demos for a year or so now, I’ve pretty much got it down – my demo kit includes a couple of projects in different stages: the multi-purple bracelet is almost done (see the cords threaded thru the endcaps and focal bead), the solid green size 8 beads, and the 3 color spiral size 6 beads (peach, white, and bronze) are bracelets in progress, and the solid black teardrop beads that are still on the jig. The other pieces show how to remove the jig from the crochet rope (the multi-color stripes on the jig), as well as some examples of using the jig to make ropes with smaller delicas and size 11 beads. And I always have a sample of what it looks like to start a bead rope without the jig – you can see it on the right in the photo, below the awl – it looks a little like a knot of beads!

I appreciate all my customers that buy from my StudioDax shop , and I love when they leave me feedback letting me know how much they enjoy using the jig, but it’s great fun doing demos to show how easy it is to use, and having people buy the jig on the spot… instant gratification!!


Tools That Delight

13 02 2011

I’ve wanted to to post a review feature on tools for a while, so I decided it’s time to do it! This is the first in a series called “Tools that Delight” and they will be tagged for easy searching in the Categories menu to the right…

As a tool junkie, I mentally rate my tools into different categories depending on how much I want them. It is not unusual for tools to change the category they are in, especially when I learn new techniques:

  • Must Have: these are the tools I can’t work without
  • Gotta Get: these are the ones that I really want, that I will use alot
  • Cool Tool: usually very specific for one unique purpose
  • Next Level Tools: usually really expensive versions of tools I have
  • Big Boys: the tools that are really expensive, or take up alot of room!

First up… the nylon faced bracelet former pliers!

Cool Tool ----> Must Have

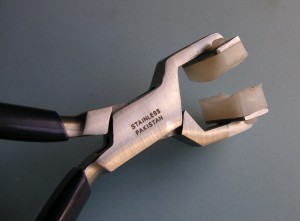
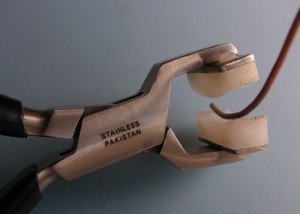
I considered these pliers a “cool tool” for many years, but over the years, they’ve become part of my “must have” toolset (yes – they are still really cool!). These pliers have nylon jaw pads that are shaped to easily bend thin metal and wire in a light consistent curve.

Smiling Jaws!

One side is convex, the other concave, so that they fit together when closed. Many of these pliers have replaceable nylon pads so that when you ding them up (and you will!) you can easily fix them – note the nylon screws that are holding them to the jaws.

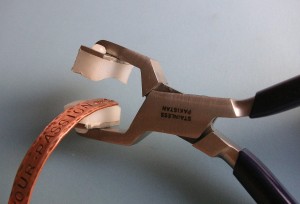
Ready to Shape

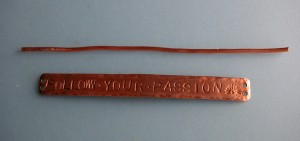
These pliers are great for shaping both narrow strips of metal sheet, as well as wire. I can easily shape up to 12g – for reference, the copper strip above is 16g, and the wire is 14g. And using them is so simple – it doesn’t get any easier!

  • STEP 1: lay wire into nylon jaw
  • STEP 2: close pliers
  • STEP 3: repeat as needed

Shaping Wire

Shaping Wire from a Bend

So simple, and the results are so clean and nice and consistent! You can easily shape wire for a bangle, or to create a “frame” which can be hammered and wrapped.

Shaping Flat Stoc

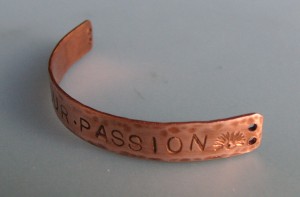
For this piece, I had already finished the copper strip design with some letter stamping, texturing, and hole punching. I am going to use it as a link for a bracelet… look how easily it gets formed!

Curved Metal Strip

Doesn’t this look great?! Nice and even, with no warping or damage, and the nylon ensures that the strip doesn’t get scratched. I am planning on antiquing the copper to bring out the details, and will add some chain, or maybe attach some leather cord, to make up a bracelet.

Hopefully… I’ve shown reason why this pair of pliers has moved into my “Must Have” list – I have a few pairs with slightly different shapes – all of them are well loved!

I’ll be posting more photos of my favorite tools, as well as some info on how they are used – let me know if there’s anything is particular you’re interested in, and I’ll try to oblige!