How the Leather Ends…?

29 05 2010

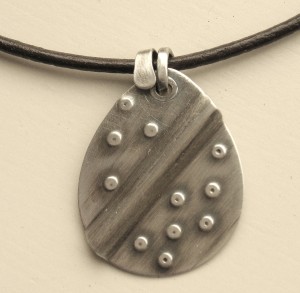
I love making pendants…. wire wrapped, metalsmithed, riveted and etched – I just love ’em! And hanging them from leather cords is my favorite way to wear them. There are many different techniques for ending leather cord – here’s one of my favorite ways, which gives me loops on the ends, so I can add a big wired hook:

The Start....

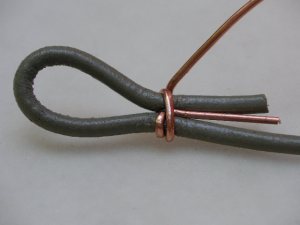
The first thing you do is make a loop in a piece of wire, and then bend the loop 90° to the stem of the wire (for reference, this is 20g wire, and 2mm leather). Then lay the end of the cord into the wire loop, and fold the tip of the cord back to make a loop in the cord. Keep the stem of the wire parallel to the cord, and make sure that the cord loop is sized for your project, since it is not adjustable! Then, wrap the wire around the cording (and the stem of the wire), making the wraps go DOWN the cord (don’t wrap the wire up the cord loop!), keeping the wire smooth.

And The Finish...

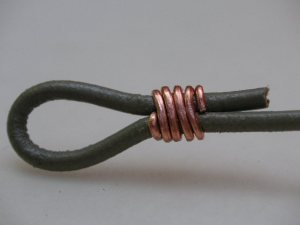
Continue wrapping the wire, keeping it smooth and taut – try not to have any gaps between the wire wraps. If you do have gaps, squeeze them together gently with chain nose pliers. Make 4-5 full wraps with the wire, and cut it flush as it aligns to the center. Press it close to the cord if needed, being careful not to mar the wraps. Cut the center wire stem, lightly file the ends as needed, and cut the leather tail close to the wrap, if you like.

Some Tips: If you have trouble, practice using 22 gauge wire. If you have gaps when wrapping the wire, pull the wire lightly toward the loop as you bring it around the cord,. If your wraps aren’t tight, then the cord can pull loose – try pulling the wire up taut, then pull tight around the cord.


I’m a Very Dirty Girl…

26 05 2010

But luckily, there’s always ways to get clean! As anyone who makes jewelry knows, working with metal is dirty work! Soldering, etching, fabrication – all of these make my hands look like they’ve been playing around inside a car engine, and most soaps can’t get them clean. And the ones that CAN clean them up always leave me feeling like sandpaper….

Grease Monkey Soap by Soap Scentsations

And then there’s Grease Monkey! I got this soap from a fellow Etsian – Soap Sensations (I always like to support the handmade community!), and the soap works great. Specifically made to clean you up after you’re doing your messiest, Grease Monkey is a cold processed soap made with natural ingredients, which leaves your skin soft, and has a clean minty scent (nothing wussy here!). And i to make my point, I thought I’d embarrass myself by showing you what I look like when working:

Where Have These Hands Been??

Just a little soldering, a little fabrication, a dip in Liver of Sulpher (LOS – for antiquing), and a bit of metal cleaning with some very fine steel wool – and my hands get pretty nasty looking. Wow – look at those nails… they look so much worse in a close-up!!

And After the Grease Monkey!

But a little Grease Monkey, a little scrubbing with a nail brush, and everything is pink and new! So I guess I clean up pretty good… huh?

So what was I working on that got me so messy? One of my favorite projects – an Initial Pendant, for a friend who is moving, and will be missed…

Bye, Bye Susan...


DIY at Maker Faire

23 05 2010

Yesterday, I spent the afternoon at Maker Faire (see my post last week), a DIY event, focusing on the “build it yourself” mind set, with an eco-friendly emphasis. I was a volunteer at the Metal Art Association of Silicon Valley (MAASV) table – we were there to let folks know what the MAASV was about, and to offer up a simple “make and take” project.

Make & Take Project

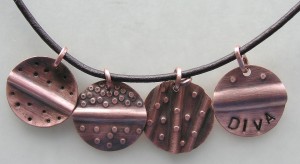
Our project was an easy charm/pendant – we provided copper discs and some simple tools, and showed folks how to add texture to metal. It was best a fun kids project, but quite a few adults took the time to make one up too.

Being a “crafty maker” I was interested in all the crafty DIY and vendors – there were informal demos on felting, sewing, knitting, paper crafts, glass bead making, etc. Here’s a few of the crafty vendors I liked:

Sugar Skulls Rock!

Isn’t this adorable? Cute kids and “Day of the Dead” – what a great combo! My favorite items though from the Frogs & Chicks table… the “iPee” caps and “iPoo” onsies!

Knit Geek Pets!

I also liked the “knit geekery” – these knit pets by MisterFunky are perfect for folks who can’t remember to feed or walk the real thing!

Not Your Kids Scooter!

The techno geekery was really amazing – handmade vehicles, rockets, steampunk, musical instruments, electronics projects with lights and sound, and a lot more – something for all, no matter how big (or small) a geek

There were alot of demos and activities for both adults and kids that really give you some different ways of looking at things… if a Maker Fair comes to your neighborhood, I suggest you go and enjoy the day!


I’m Hooked on Wire…

20 05 2010

…And you can be too! Hooked on Wire (aka: HOW) is an annual wire retreat held in the San Fransisco Bay Area – imagine what you can learn by spending three days (Sept 10-12), with some of the top wirework artists in the country!! This year, Lisa Niven Kelly, Dallas Lovett, and Barb Switzer are the fabulous workshop instructors, and I’m thrilled to be joining HOW this year as one of the evening instructors! My project will be a little bit of a break from all the wire working done during the day – you’ll get a chance to play with some metal and create a fun “FAN-tastic” pendant :

What a "FAN-tastic" Pendant!!!

Hooked on Wire is a wonderful opportunity  to expand your skills, meet great people, and have a whole lotta fun! So check out the website for more info on projects and tickets, and plan a mini vacation – you deserve a few days for yourself! This is the 7th year for HOW, and it just gets better and better…!!


Goody, Goody…. Buying Goodies!

16 05 2010

One of the fun things about creating jewelry is that I get to go to go to wholesale shows and shop for all kinds of goodies! Since I also teach, “buying things for class projects” is my favorite excuse for going overboard!

You Can NEVER Have Enough Silver!!

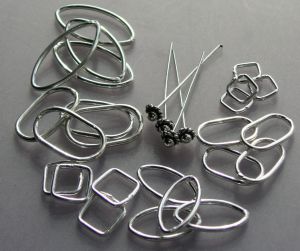
ABOVE: Although I make many of my own components, I prefer buying some pre-fabricated items… I really hate to make jumprings if they are made with wire thinner than 18g, so I tend to buy them in bulk and stock up. And I loved finding these fun shapes – marquis, ovals and squares – they make fun earring components, and my students love them!

One is Enough!

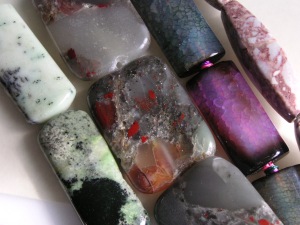
ABOVE: I teach several classes where we make wire wrapped pendants, and these large sized bead strands are some new stones I found. From the left, they are: American Jade (this may be a descriptive name…. I think it is probably a jasper of some kind), African Bloodstone (these have some wonderful pyrite inclusions), dyed Trucolor Jade (again, this may be a descriptive name…. I think it is probably a quartz), and Red Jasper.

Some Pretty Things!

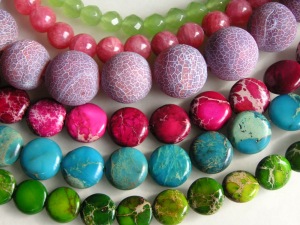
ABOVE: These are what I call “fun and trendy” strands… they work great for earrings and bracelets, and make a great accent for metal work. The bright colors don’t need too much else, and they look fabulous paired up with the silver shaped jumprings above! From the top, they are Dyed Quartz (a warm green), Dyed Quartz (this pink strand is a great imitation of expensive Rhodicrosite, complete with cream colored striations!), Crackle Etched Agate, and 3 strands of brightly Dyed Jasper.

I will be creating some new pieces using these components and beads soon – I’ll make sure to post a few examples here when I add them to my shop!


I’ll See You at The Faire…

14 05 2010

At Maker Faire, that is! For those of you who don’t know, Maker Faire is a yearly event focusing on the growing DIY movement of people who look at things a little differently… Scientists, engineers, and craftspeople come together, promoting and educating their passions to a very receptive audience – it’s a little bit Star Trek, a little bit Steve Jobs, and all fun!

Hope to see you at the Faire!!

I am a member of the Metal Arts Association of Silicon Valley (MAASV), which is a great community of metal arts folks in the SF Bay Area. We have a booth set-up at the Faire where we will be doing “make and take” projects. The purpose is to introduce the MAASV to the public, while having some fun, and I am looking forward to participating. I am also hoping to have a chance to check out some of the other booths before I start – I’ll be there between 4:00 – 8:00, and if anyone is planning on showing up, please come by and say hello!


It’s Showtime!

12 05 2010

The days are getting longer, the temperature is rising, and the flowers are starting to bloom. We all know what that means – it’s showtime! Noooooo – not the circus, and not the theater, but the summer craft show circuit. I love being outside, and interacting with customers, and I thought it was time for a quick review of what we call “THE CHECKLIST” – the what you absolutely positively, must bring with you when you do craft shows… (NOTE: click on the list to enlarge, then print):

These are the things that anyone doing a craft show should remember, regardless of what they craft. And… if you are a jewelry kinda person like me, than you’ll want to remember a couple of extra items, just to make sure that you’ve got everything covered:


I hope that you find these useful as you start planning your summer craft show schedule. There are plenty of lists all over online, so if these don’t work for you, just do a quick google and I’m sure you’ll find something else.And if I missed something critical – please let me know!


For All You Mothers…

9 05 2010

Well, I don’t have any kids, and I don’t crochet, but I still love the Inner Hooker (isn’t that just a great name!?!), a shop by a fellow Etsian. And no, she isn’t selling the babies – she’s selling the patterns for the crochet items…!

Just Hangin' Around..

A Well Coordinated Cutie!

Since mothers and babies sorta go together, I figured I would post these photos in honor of Mothers Day. I loved checking out the Inner Hooker, and so will you. Maybe I’ll try one for a friend… how hard could it be to crochet a little bitty cap? Her patterns are sure to make your kid the envy of all the other kids. Well, I guess the other kids won’t know, but – their parents will be really jealous!!

So for all you Mothers out there – Happy Mothers Day!


An Oldie but Goodie…

7 05 2010

Ok, So Maybe I'm a Little Defensive....

I have this stamped bracelet that I made many, many years ago when I was first starting to do metal work. The original clasp had a small wrapped lampwork bead, which I replaced with a simple hook when the bead eventually broke. I’ve made a lot of cool bracelets since then – wireworked, hand made chains, some with etched copper panels – all sorts. But THIS is the bangle I’ve been wearing 4-5 times a week lately –  I kinda feel a little naked without it.

As a jewelry designer, like other artists and craftspeople, I am always looking to expand my skills and learn new techniques. But this very simple and easy stamped bracelet is like an amulet to me now – it represents my start in metalworking, and I always feel a little creative when I feel it on my wrist.

I’m sure I’ll eventually swap it out for something else, but for now, I’m a little superstitious, and I think I’ll keep it on


“Will Write Tutorial For Tools….”

5 05 2010

Fun with Forming Block!!

Last month, I was thrilled to be selected as a “tools for tutorial” match… basically, a great vendor on Etsy who sells tools (Evie’s Tool Emporium) was looking for someone to show folks how to use one of their new tools by writing up a brief tutorial. A wonderful blog called Totally Tutorials acts as the go-between, and I am pleased to now post this “Simple Formed Pendant” tutorial using a very cool metal mini-forming steel block. I tried to keep the project simple so that if you are unfamiliar with metalworking, you’ll find this to be a fun to make, but even experienced metalsmiths will enjoy using the forming block, and adding this technique to their skillset.

Project Tools

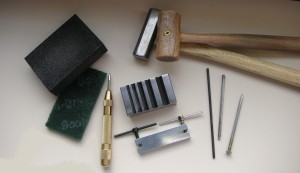
These are the tools I used: sponge block and green scrubbie (to clean the disc), a spring-loaded center punch, the forming block, a twist hole punch, a hammer and a mallet, and some punches (shown are a transfer punch, a nail, and a doming punch). You will also need a metal disc for the pendant – for this project I am using a 15/16 inch diameter circle in 24g copper. Please note that 24g – 26g works well with this tool!

Pendent Disc on Forming Block

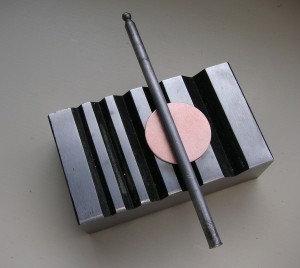
Clean the disc with the sanding block or green scrubbie, and place it over one of the valleys in the forming block, laying a punch over it. I am using a doming punch, but if you don’t have one, you can use a regular steel nail, as long as it fits easily into the valley.

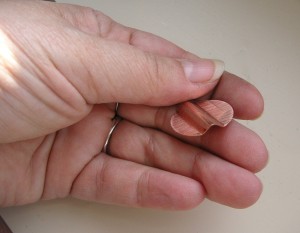
Hammering a Fold into the Disc

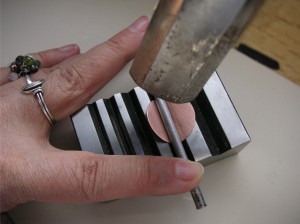
Hold the punch firmly in place, and hammer it on the disc, into the valley, forming the metal (repeat to get a good crease).

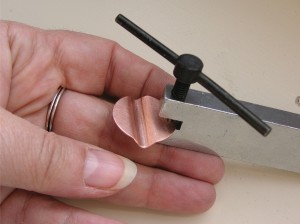
Flattening the Disc Edges

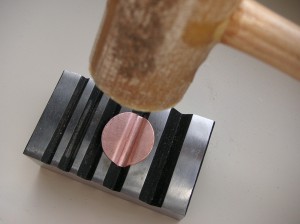
Remove the punch, and flatten the disc edges using a wood or rawhide mallet. If you don’t have a mallet, lay a piece of leather over the disc, and use the hammer.

Formed Disc - See How Easy!!

Making the Hole for the Bail

Make a hole in the disc using a twist hole puncher or a drill. If you don’t have a hole puncher of a drill, you can lay the disc on a block of wood, and hammer a sharp nail into the disc. This can cause the disc to warp, so you will need to flatten it out.

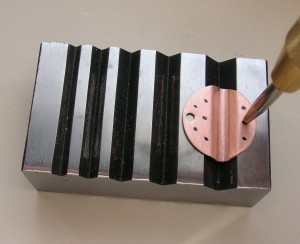
Adding some Texture

Lay the disc onto the forming block, laying the crease into a valley, as shown. Use the center punch to create a pattern (you can mark the pattern on the disc with a Sharpie, like I did). I like to file the tip of my punch, and punch on the BACK, so that the pattern is in relief on the front, but you can create a pattern however you like! If you don’t have a spring-loaded center punch, you can hammer the pattern with a regular center punch or nail

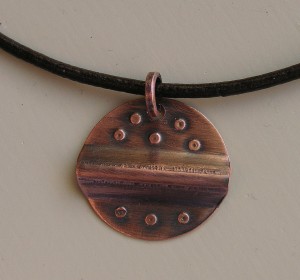
Adding the Finishing Touches

Add a bail (I used a simple jumpring), and antique/buff to highlight the details, and voila! You have a cool metal formed pendant!

Another Pendent - This One in Silver

After I made a few in copper, I decided to make one in silver, using the same basic steps. You can also add some other techniques, such as stamping in a word or design, or adding some beads or dangles. It takes a little practice, but just have fun with it!