A Little Bling Bling

28 02 2011

A Little Bling Goes A Long Way….

It can be tricky to combine the sparkle of crystal with stark metalwork, but if you keep the design sleek and simple, then the materials work together really well. Back in September, I taught a class at Hooked on Wire, and attended a presentation from the Swarovski folks… I got loads of little crystal bits (see my previous post on this HERE),  and finally got around to creating a new design, which I really love!

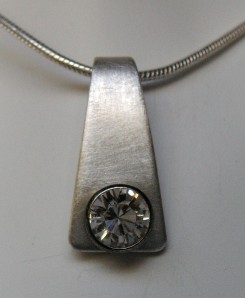
I designed the piece using heavy gauge sterling silver (18g), which I gave a soft matte finish, and added a preset 7mm crystal rivet cup (NOTE: click on photos to enlarge):

Simplicity - Sparkle and Silver

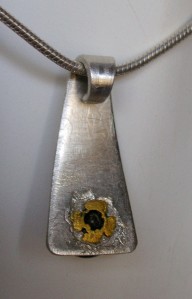
Isn’t this a great look!?! I cut a simple triangle from some scrap silver sheet I had, rounded the edges and the corners, and used a combination of files, sanding blocks, and polishing papers to get the soft finish. I then drilled a hole so I could add the crystal (the crystal comes pre-set in the rivet setting).

A Modern Style, A Classic Look

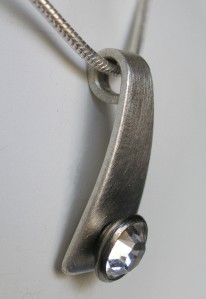
From the side view, you can see a bit more detail – when I drilled the hole for the crystal setting, I beveled the edge of the hole to accommodate the angle and allow the cup to seat into the silver. I curved the silver lightly to balance the formed bale – the minimalist shape provides a graceful way to hang the pendant on a chain.

Best Not Seen... The Back!

The back looks a bit messier than it really is… the tube (rivet) was quite long, so I had to cut it’s length, and then cut down the tube to create tabs to fasten it to the silver. Since the rivet is brass, I was concerned that if I manipulated it too much, it would become brittle and crack. So I simply hammered the tabs down, and added a blob of E6000 to cover the tab edges so they don’t catch or scratch (E6000 is a thick adhesive).

Just Hanging Around

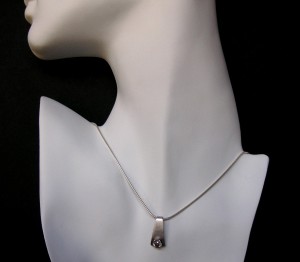
I love how this pendant looks – right at the collarbone, showing on the skin. The crystal makes it pop, and with the matte finish on the silver, this is a piece that looks great jeans and a sweater, or all dressed up – since it’s Swarovski, the quality crystal  sparkles however you wear it!

I gave this one to a friend as a thank you gift, but I’ll be making a few more, maybe even with different shapes, but the same styling. I just love when the end result looks better than what I imagined!


Sparkly, Shiny, Things!

15 09 2010

Ohhhhh…. Swarovski!

If you look at my jewelry, you’ll notice that my style leans toward natural, organic styles. And even though most of my jewley just doesn’t work with them, it doesn’t stop me from wanting to play with sparkly shiny things! So last week at Hooked on Wire, I was just as excited as everyone else to see the presentation from the Swarovski rep, and check out all the new products coming out. There were various crystal items strewn all over the tables to keep us in our seats! And even more fun, at the end of the presentation, WE GOT TO SWEEP UP THE TABLES!

Shiny Goodies!!

So look at what I got…! I have no designs in mind for what I’ll be doing with these, but I just couldn’t help myself – I wanted them, so I took’em!! Most of these will need to be set with prongs, like faceted gemstones, but some are flat backed, like the fabulous blue checkerboard crystal. Some styles have rivet backings, that require the use of a special setting tool to prevent the crystal from breaking. But I don’t have the special setting tool, so I had to see if my riveting skills would be good enough…

Silver Petals with Crystal Rivets

Aren’t these just so cute!? These crystals are only 4mm each (less than 1/4 inch), but they have a really great shine. They are pre-set in small brass multi-prong rivet seats, which makes them easy to use… ok, not real easy, but since I’ve been riveting tubes for a few years, I guess my riveting skills were just fine!

Side View Close-up

These look so cool from the side – the textured sterling petals (5/8 inch) are curved, creating a basin for the crystals. The brass seat has a cone shape, which holds the crystal up… I like that it gives it a more dimensional look.

Side View of the Crystal Rivet

At this angle, you can see the bottom a little. The brass seat includes a short tube, which was set in a hole in the silver, and then flared to hold the crystal tight. It’s a little tricky to flare the rivet without breaking the crystal, but I was able to get it done by going slow. The result is a very sweet pair of earrings. They measure less than an inch total, but they have a brilliant sparkle!