A Cool Cool, Clasp

23 04 2011

I doodle with wire… that’s right, I’m a doodler! When I’m sitting in front of the TV, I often have a few spools of copper wire in front me, along with my tools, and just twist and wrap and fold and coil! Seeing different designs and ideas come together is very satisfying!

Sometimes I start out with a sketch that I made, and see how it turns out. And sometimes I start with something specific in mind, to see if I can make it work. I wanted to see if I could come up with a simple circular clasp, maybe to use for some multi-stranded necklace designs, and this is how it progressed!

Doodle Try #1

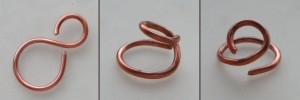
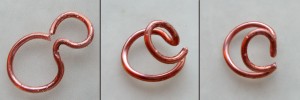
I had a few parameters for the clasp: I wanted clean lines, I wanted the hook side and the eye side to lay in the same direction so it would be comfortable on the neck, and it needed to be easy to use. The first “doodle” started with a figure “8” in wire, which I sorta folded over, so that the smaller loop rested on top of the bigger loop. This has a construction issue, because I would have to solder both ends to a common wire at the point where the clasp folds, leaving 2 potential weak spots.

Doodle Try #2

The next doodle was similar in look, but it starts with an “O” shape that is pinched to create the two loops. This has a real advantage over the first style, in that the ends of the wire meet together, so it only has one connecting point. And since the original shape is round, it is easy to make sure the solder point doesn’t get stressed.

Final Clasp in Silver

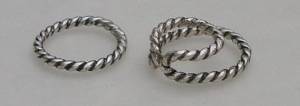
I decided to create the clasp using some twisted wire I had, and I love the end result. I started by soldering a large ring, and then shaped it like an “8” using some mandrels. Once the loops were nice and round, I carefully folded it at the place it pinched to create the hook. Next, I created the other side sizing it to the clasp.

Silver Clasp Closed

Here is the clasp closed – you can see how the two sides are balanced, so it looks nice, both sides lay in the same direction, so it is flat against the neck, and there are no wire ends, so nothing catches onto your clothes or sticks into you.

I have tried variations of this without soldering, some work ok, but the advantage of the soldering is that it makes the clasp robust. Knowing a variety of techniques is key to being able to create your designs as you envision them…!


I Love Mandrels!

31 03 2011

Part of the “Tools that Delight” posts… As a wire worker, mandrels are some of my all time favorite tools. Since there are always lots of wraps and loops and coiling in my designs, it is important that there is consistency in the techniques used – sloppy wire work stands out, and makes a good design cheap.

Wire Wrap Stepped Mandrels

These are a new favorite tool of mine! I’ve been doing wire work for many years, and I’ve always used round nose pliers – I’m pretty good at it too! But there are some problems that folks have with pliers – most notably, it is difficult to repeat wire wraps with consistency, because the wire is easily moved up and down the pliers, resulting in loops that are not the same size.

Wire Wraps.... Step Style!

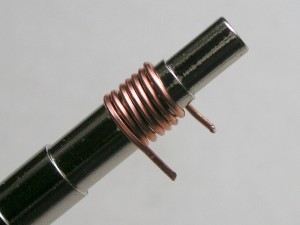
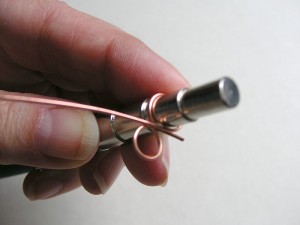
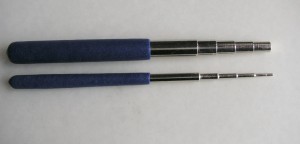
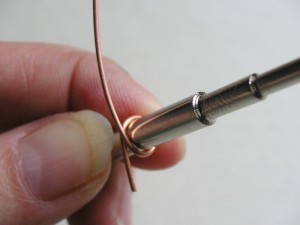
Using stepped mandrels ensures that the wraps are always consistent, because the mandrels are cylindrical (rather than cone shaped), and the wire actually rests on a “step” so it can be repeated over and over with no change.

Coils and Jump Rings

Look how nice this coil looks, perfect to make a few jump rings. I confess – I have a complete jump ringer power system to make jump rings in quantity. But often, I just need a few, and it’s easier to wrap up a coil and saw or cut them.

Easy Links - a "Figure 8"

And it’s simple to make links – these mandrels have a range of sizes between 1.5mm and 10mm, so it’s super simple to create whatever size you need for your project. I make a whole bunch of these at one sitting, so that I always have them ready when needed.

Hammered Link

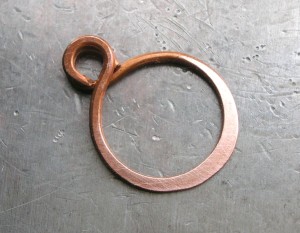
This component (above) was made using a small wrap on one end, and a much larger wrap on the other. Then, the link was hammered flat to harden it so it doesn’t pull open, and also, because it looks cool hammered

I really really love these, and I now keep a set in my portable tool kit and bring them to class for my students to use.

Textured Padded Grip - Set of 2 Steel Stepped Mandrels

I also decided to sell them – if interested, they are available at my Etsy store in the Tools section. I include a tutorial on using the mandrels, as well as some practice wire, so it’s easy to get going… wire work is fun, and the ability to make your own jump rings and links and clasps is a great way to start adding handmade wire to your jewelry.


What’s the Hoopla over Hoops??

5 10 2010

Like many women, I loooove hoops! I make quite a few, in different shapes and weights, and although some designs can get a bit complex, the basic “one piece of wire”  hoop style is quite easy to make. It’s been a while since I posted a new tutorial (sorry!), so tonight it’s a “how-to” on making hoops! You’ll need the basic jewelry tools (chain nose pliers, cutters, and round nose pliers), as well as some metal smithing tools (steel block, chasing hammer, and a steel ring mandrel). But if you don’t have all of the metal smithing tools items, you can still practice all the basic steps without hammering…

How to grasp the wire

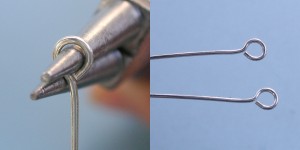
First, we cut 2 pieces of 20g dead soft round wire, each 3 1/4 inch long, and file/sand the ends flus. For reference, I am using sterling silver wire (plated wires may get damaged, but copper works great). Next, we will create a small, centered loop on one end of each wire. Start by grasping the wire between the jaws of the round nose pliers – note how the wire is flush, and doesn’t stick up!

TECHNIQUE TIP: The closer the wire is to the tip of the pliers, the smaller the loop.

Rotate the wire - create the loop

Now, while holding the pliers firm, rotate the wire around one of the jaws to create a loop. If the loop doesn’t close, just reposition it, and pull the wire until you get a nice closed loop. Repeat with the second wire, making sure they look the same.

Centering the loop

Now we need to center the loop over the wire. The easiest way to do this is to grasp the wire with the round nose pliers, so that the wire is hanging down between the jaws, and then gently pushing the wire back, which will reposition the loop and bring it to the center. If the loop opens up, just adjust it a bit…. this takes a little fiddling with, so just be gentle and keep at it until it looks right!

Flatten the loops.... a little bit!

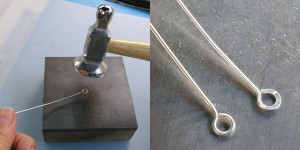
Wire is pretty malleable, and we need to harden the loops up a bit to keep them from opening. An easy way to do this is to lightly hammer them, using a chasing hammer on a steel block. The photo above on the right shows how hammering the loop lightly will flatten the wire, and change it’s appearance a little. The wire on the left has not yet been hammered, so you can see the difference. If needed, close up the loop – hammering will open it up a little.

Shaping the hoops

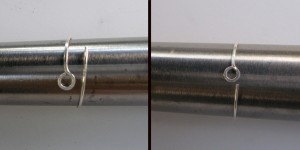
Now comes the part where they actually start to look like earrings! Start by wrapping the wire around a small end of the ring mandrel, and then sliding it down until the ends just meet. This way, the wire hugs the mandrel – if you start out wrapping it at the larger end, the wire springs open a bit, and you may not get the hoop to close. If you don’t have a ring mandrel, you can wrap the wire around anything that is the right size – a fat marker, a bottle top, or a pool cue make good alternatives.

Hardening the hoops

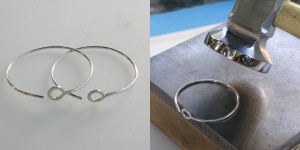
We’re almost done! Lightly hammering the hoops will harden them, so that when we open and close them, they spring back to shape. Make sure to position the loop over the side, and leave about 1/2 inch from each end unhammered. The hoops may get a little out of shape from the hammering – that’s ok – we will get them back in shape!

Finishing them up

The hoops look pretty good, but we need to finish them by making the earring “catch” which fits into the loops to keep them from falling off. Using chain nose pliers (I am using bent chain nose, but any flat pliers will work), bend up the end sharply  – about  1/8 inch.

Final touches

If needed, close up the hoops, and slide them back over the mandrel – this will make them nice and round, and ready to wear. You can easily add additional charms or bead drops (I added some raw faceted citrine bead dangles), and change them to match your outfit.

TECHNIQUE TIP: Hammering the wire is an easy way to harden the wire, which helps to keep it shape. I also like the look of hammered wire. But an alternative is to create the hoops without any hammering, and then throw them in a jewelers tumbler for an hour or so – the tumbling will harden the wires, so that they have a springiness to them.

Have fun…!


Getting Hooked (or, How to Make a Clasp)

26 07 2010

Being able to make your own jewelry findings means that you can always create what you need, in the size you need. I love finishing off a handmade piece with a well made clasp, and one of my favorites is the basic wire hook.

Step 1: flatten one end

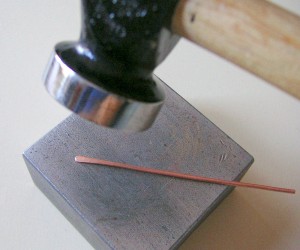
I start with a 2.5 inch length of wire, in a pretty heavy weight. I’m using 16g here, but you can change up the gauge and the length to customize your clasp. Sand or file the ends clean, and hammer one end to create a “paddle” shape.

Step 2: create a small loop

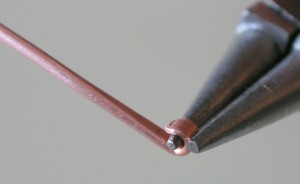
Next, you need to create a small loop (as small as possible) at the flattened end, using the very tip of my round nose pliers.  Make sure you don’t use good precision round nose pliers – the heavier gauge wires could twist the tips out of alignment and ruin your pliers!

Step 3: make a large loop

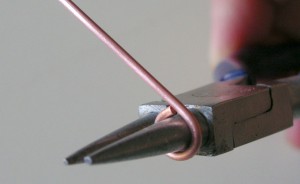
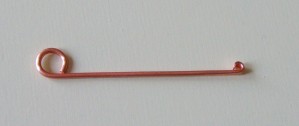
On the other end of the wire, make a larger loop, using the base of your round nose pliers. Make sure that the loops are facing the same direction, as shown below:

The wire is now ready to be shaped

The loops are round, facing the same direction. The wire is nice and straight, and  can now be shaped around a mandrel into a hook (I use a pen in the following steps, but you can use any appropriately shaped rod as a mandrel).

Step 4: holding the wire

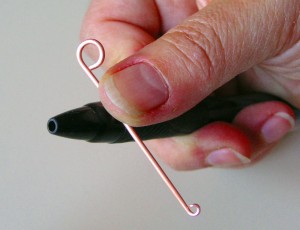
Hold the wire across the top of the pen, with both of the loops facing up. Position your thumb a bit closer to the large loop, and hold the wire tight on the mandrel.

Step 5: bending the wire

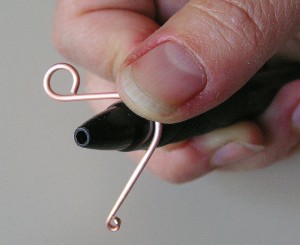
Start bending the wire over the mandrel on both sides – the end with the small loop will be longer. Bend the wire gently, ensuring it keeps a rounded shape.

Step 6: shaping the hook

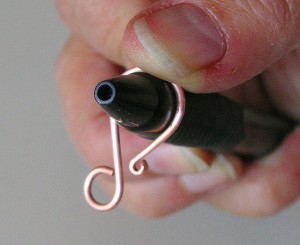
Once both sides are pushed down (like an upside down “U”), push the longer end with the small loop under the mandrel, toward the large loop. This gives the clasp a “swoop” shape, which helps with the integrity of the hook.

Step 7: the finishing touches

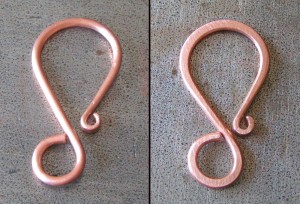
Now the hook is done. The final step is to harden the wire, so that the clasp will not bend out when used. You can either whack it with a mallet, which will keep the wire round (as shown on the left), or you can lightly hammer the wire on the curves, which will result in a clasp as shown on the right. If the curves open up a little, just reshape them closed. And don’t forget to antique your clasp to match your chain and metal components if needed.

Practice a few in copper before working with silver, and adjust the wire gauge and length to create variations that suit your designs and style. You  will never be “held hostage” to store bought components again!


“Will Write Tutorial For Tools….”

5 05 2010

Fun with Forming Block!!

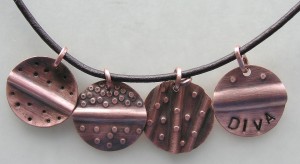
Last month, I was thrilled to be selected as a “tools for tutorial” match… basically, a great vendor on Etsy who sells tools (Evie’s Tool Emporium) was looking for someone to show folks how to use one of their new tools by writing up a brief tutorial. A wonderful blog called Totally Tutorials acts as the go-between, and I am pleased to now post this “Simple Formed Pendant” tutorial using a very cool metal mini-forming steel block. I tried to keep the project simple so that if you are unfamiliar with metalworking, you’ll find this to be a fun to make, but even experienced metalsmiths will enjoy using the forming block, and adding this technique to their skillset.

Project Tools

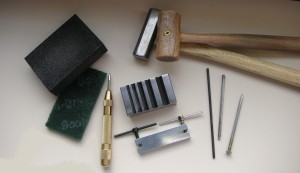
These are the tools I used: sponge block and green scrubbie (to clean the disc), a spring-loaded center punch, the forming block, a twist hole punch, a hammer and a mallet, and some punches (shown are a transfer punch, a nail, and a doming punch). You will also need a metal disc for the pendant – for this project I am using a 15/16 inch diameter circle in 24g copper. Please note that 24g – 26g works well with this tool!

Pendent Disc on Forming Block

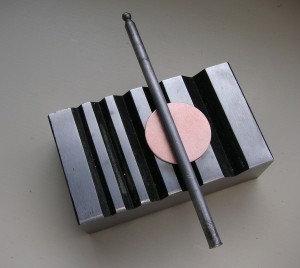
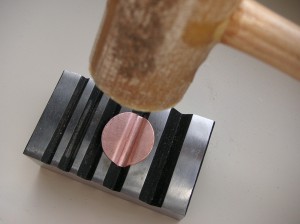
Clean the disc with the sanding block or green scrubbie, and place it over one of the valleys in the forming block, laying a punch over it. I am using a doming punch, but if you don’t have one, you can use a regular steel nail, as long as it fits easily into the valley.

Hammering a Fold into the Disc

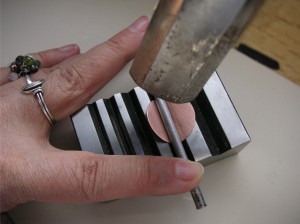
Hold the punch firmly in place, and hammer it on the disc, into the valley, forming the metal (repeat to get a good crease).

Flattening the Disc Edges

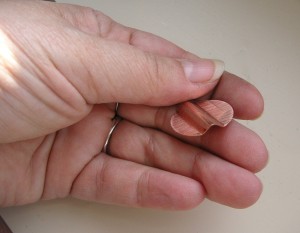
Remove the punch, and flatten the disc edges using a wood or rawhide mallet. If you don’t have a mallet, lay a piece of leather over the disc, and use the hammer.

Formed Disc - See How Easy!!

Making the Hole for the Bail

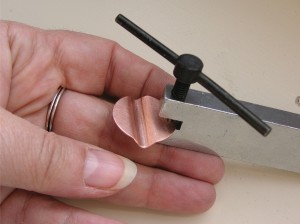
Make a hole in the disc using a twist hole puncher or a drill. If you don’t have a hole puncher of a drill, you can lay the disc on a block of wood, and hammer a sharp nail into the disc. This can cause the disc to warp, so you will need to flatten it out.

Adding some Texture

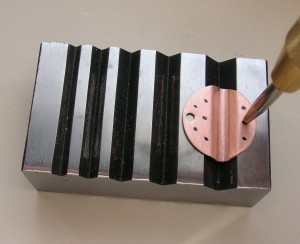
Lay the disc onto the forming block, laying the crease into a valley, as shown. Use the center punch to create a pattern (you can mark the pattern on the disc with a Sharpie, like I did). I like to file the tip of my punch, and punch on the BACK, so that the pattern is in relief on the front, but you can create a pattern however you like! If you don’t have a spring-loaded center punch, you can hammer the pattern with a regular center punch or nail

Adding the Finishing Touches

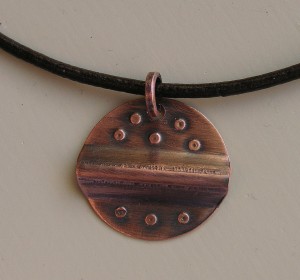
Add a bail (I used a simple jumpring), and antique/buff to highlight the details, and voila! You have a cool metal formed pendant!

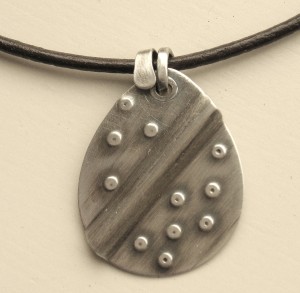
Another Pendent - This One in Silver

After I made a few in copper, I decided to make one in silver, using the same basic steps. You can also add some other techniques, such as stamping in a word or design, or adding some beads or dangles. It takes a little practice, but just have fun with it!